Why You’ll Love This Recipe
This recipe is a wonderful way to extend the freshness of salmon without the need for refrigeration. The canning process locks in the flavors and nutrients, providing you with a convenient, shelf-stable protein that’s ready to use at any time. Plus, it’s incredibly easy to make, requiring just a few ingredients and some time with a pressure canner. You’ll love how simple it is to preserve salmon and the delicious results it yields.
Ingredients
- 4 lbs salmon fillet (skin-on or skinless, deboned)
- 2 tsp kosher salt or canning salt
- 16 peppercorns (optional)
- 8 tsp neutral oil (optional)
(Tip: You’ll find the full list of ingredients and measurements in the recipe card below.)
Directions
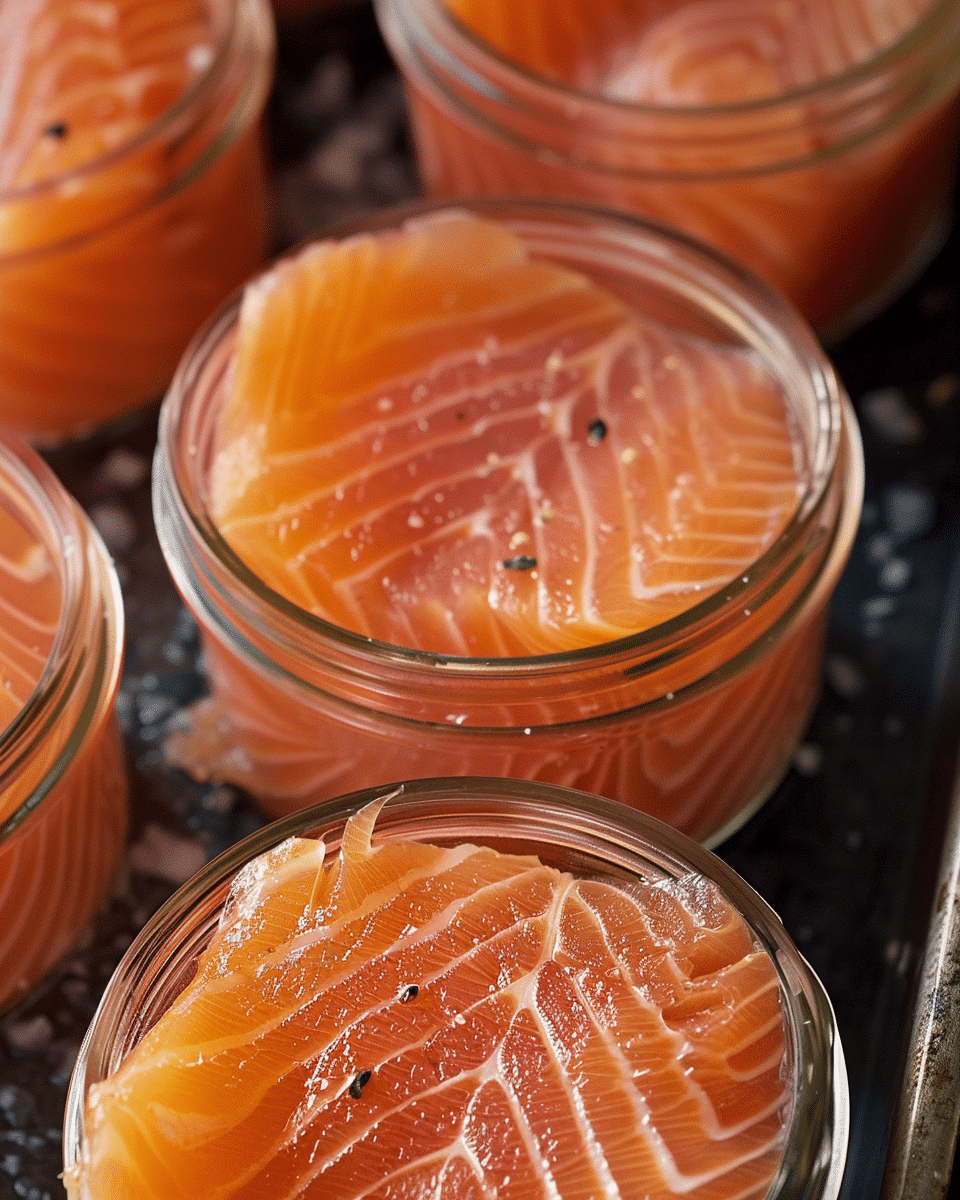
- Prepare the Jars: Start by adding 8 oz of salmon to an 8 oz canning jar. If using skin-on salmon, place the skin side towards the jar. Leave about 1 inch of headspace in the jar, but pack the salmon as tightly as it will fit.
- Season the Salmon: Sprinkle 1/4 tsp of salt on top of the salmon in each jar and add 2 peppercorns (optional). Wipe the rims of the jars with a clean, wet towel, and close the jars with canning lids, tightening them finger-tight.
- Load the Pressure Canner: Line the bottom of your pressure canner with a tea towel or canning rack to keep the jars from making direct contact with the pot’s bottom. Add 2 inches of water to the canner. Then, place the jars in the canner, ensuring that the water comes within 1 inch of the tops of the jars. If you are canning more than one layer of jars, separate the layers with a metal canning rack.
- Process the Jars: Process the jars for 110 minutes at 10 PSI (pounds per square inch) following your pressure canner’s instructions. Be sure to adjust the heat regularly to maintain a steady pressure of 10 PSI, as cooking at too high a pressure can burn the contents or break the jars.
- Cool the Jars: After the processing time, turn off the heat and allow the pressure to decrease naturally. Once the pressure gauge shows 0 PSI, carefully remove the jars using a jar lifter. Place the jars on a towel-lined surface and allow them to cool to room temperature, which should take about 3-4 hours.
- Check the Seal: After the jars have cooled, press down the center of each lid. If the lid does not pop back up, the jar has sealed properly. You can then remove the lid rings, rinse and dry the jars, and replace the rings if desired. Your canned salmon is now ready to be stored at room temperature.
Servings and Timing
- Servings: 8
- Prep Time: 40 minutes
- Cook Time: 1 hour 50 minutes
- Total Time: 6 hours 30 minutes
Variations
- Salmon Type: You can use different types of salmon (wild-caught or farm-raised) depending on availability and preference.
- Spices: Experiment with different seasonings like garlic, onion powder, or even herbs like dill to customize the flavor of your canned salmon.
- Oil: Adding neutral oil to the jars is optional, but it helps ensure the salmon stays moist and tender during the canning process.
Storage/Reheating
- Storage: Once sealed, your canned salmon can be stored at room temperature in a cool, dark place for up to one year. Always check the seal before use to ensure the jar is still safe.
- Reheating: To use, simply open the jar and drain the liquid. The salmon can be eaten straight from the jar or incorporated into recipes such as salmon patties, salads, or sandwiches. It can be reheated in a pan on low heat or in the microwave.
FAQs
How long can canned salmon last?
Canned salmon can last for up to one year when stored in a cool, dark place, as long as the seal remains intact.
Can I use frozen salmon for canning?
Yes, you can use frozen salmon, but make sure to thaw it completely before canning.
Can I can salmon without a pressure canner?
No, salmon must be processed in a pressure canner to ensure it is safe for long-term storage. Boiling water canners cannot reach the high temperatures required for safely preserving fish.
How do I know if the canned salmon has gone bad?
Check the seal on the lid. If the lid is bulging or the seal is broken, discard the jar. Also, if the salmon has an off smell or unusual color, it may have spoiled.
Can I use skinless salmon for canning?
Yes, you can use skinless salmon, but be aware that the skin helps hold the fish together during canning, so you may need to pack the jars more tightly.
Do I need to add water when canning salmon?
No, you do not need to add any water. The salmon will release its natural juices as it cooks, creating the liquid needed for the canning process.
Can I double this recipe?
Yes, you can double the recipe by using larger jars or increasing the number of jars in the pressure canner. Just make sure to adjust the seasonings accordingly.
Can I add other ingredients to the jars?
Yes, you can experiment by adding herbs, spices, or even vegetables like onions or garlic to the jars for additional flavor.
How do I prepare canned salmon?
Canned salmon can be used in many recipes such as salmon cakes, pasta dishes, salads, or even eaten on its own with crackers or bread.
Is canned salmon healthy?
Yes, canned salmon is a great source of protein, omega-3 fatty acids, and other nutrients, making it a healthy option for a variety of meals.
Conclusion
Canning salmon is a simple, cost-effective way to preserve this nutritious fish and enjoy it throughout the year. With just a few ingredients and the right equipment, you can store salmon safely and conveniently. Whether you’re preserving your own catch or simply want a reliable way to have salmon on hand, this canned salmon recipe will become a staple in your kitchen.
Print
Canned Salmon Recipe (How to Can Salmon)
- Total Time: 6 hours 30 minutes
- Yield: 8 servings
- Diet: Gluten Free
Description
This canned salmon recipe is a simple and efficient way to preserve fresh salmon for later use. With only two key ingredients and a pressure canner, you can easily store salmon for months after the fishing season ends.
Ingredients
4 lbs salmon fillet (skin-on or skinless, deboned)
2 tsp kosher salt or canning salt
16 peppercorns (optional)
8 tsp neutral oil (optional)
Instructions
- Prepare the Jars: Start by adding 8 oz of salmon to an 8 oz canning jar. If using skin-on salmon, place the skin side towards the jar. Leave about 1 inch of headspace in the jar, but pack the salmon as tightly as it will fit.
- Season the Salmon: Sprinkle 1/4 tsp of salt on top of the salmon in each jar and add 2 peppercorns (optional). Wipe the rims of the jars with a clean, wet towel, and close the jars with canning lids, tightening them finger-tight.
- Load the Pressure Canner: Line the bottom of your pressure canner with a tea towel or canning rack to keep the jars from making direct contact with the pot’s bottom. Add 2 inches of water to the canner. Then, place the jars in the canner, ensuring that the water comes within 1 inch of the tops of the jars. If you are canning more than one layer of jars, separate the layers with a metal canning rack.
- Process the Jars: Process the jars for 110 minutes at 10 PSI (pounds per square inch) following your pressure canner’s instructions. Be sure to adjust the heat regularly to maintain a steady pressure of 10 PSI, as cooking at too high a pressure can burn the contents or break the jars.
- Cool the Jars: After the processing time, turn off the heat and allow the pressure to decrease naturally. Once the pressure gauge shows 0 PSI, carefully remove the jars using a jar lifter. Place the jars on a towel-lined surface and allow them to cool to room temperature, which should take about 3-4 hours.
- Check the Seal: After the jars have cooled, press down the center of each lid. If the lid does not pop back up, the jar has sealed properly. You can then remove the lid rings, rinse and dry the jars, and replace the rings if desired. Your canned salmon is now ready to be stored at room temperature.
Notes
Ensure the salmon is packed tightly but not overly compressed.
Optional: Add herbs, spices, or garlic for extra flavor.
Adding neutral oil helps keep the salmon moist during the canning process.
Salmon should be processed in a pressure canner for safety. Boiling water canners cannot achieve the high temperatures required.
- Prep Time: 40 minutes
- Cook Time: 1 hour 50 minutes
- Category: Preservation
- Method: Pressure Canning
- Cuisine: American
Nutrition
- Serving Size: 1 jar (8 oz)
- Calories: 300
- Sugar: 0g
- Sodium: 1200mg
- Fat: 22g
- Saturated Fat: 3g
- Unsaturated Fat: 19g
- Trans Fat: 0g
- Carbohydrates: 0g
- Fiber: 0g
- Protein: 22g
- Cholesterol: 60mg


